Introduction
There is no doubt that fuzzing has become one of the main techniques to use when it comes to identifying bugs and vulnerabilities in software products. This technique consists in running a piece of software a high number of times per second while feeding it input data that is progressively mutated by tools known as fuzzers. The main goal is to find input data that the software under test is unable to handle properly, leading to memory corruption bugs or hangs.
Fuzzing has risen in popularity in the last decade thanks to its great effectiveness and ease of use. By fuzzing, researchers were able to identify some of the most relevant vulnerabilities to this day such as Shellshock or Heartbleed which both affected millions of devices from all around the world.
Although this technique is vastly used to test software targeting general purpose platforms, it poses a series of challenges when applied to software development or research in the field of embedded systems and IoT. But, why would anyone want to fuzz the Internet of Things? The answer is simple, these devices work by communicating between each other and receive great amounts of data from external sources. If that data is not properly validated, vulnerabilities can arise. Fuzzing allows us to automate the process of generating potentially malformed input data so software can be thoroughly tested.
In this article we will discuss how we could apply fuzzing to software developed for embedded systems and IoT using techniques such as emulation and dynamic instrumentation, with the main goal of learning a new way of evaluating the security of devices like routers, smart lightbulbs, industrial IoT, etc.

Fuzzing with emulation and dynamic instrumentation
Given that these kinds of devices are usually known for being resource-constrained, we will want to avoid fuzzing using the original hardware. Doing it from a laptop or desktop computer by emulating the firmware or its components could be a compelling solution. Unfortunately, anyone that has ever tried to emulate software designed for specific platforms knows of the instability and compatibility issues associated with this. This case is no exception, the vast majority of IoT software will fail to be emulated using tools such as QEMU due to strong dependencies with other processes or additional hardware such as antennas or auxiliary MCUs. In order to solve this, we could:
Real world example: Netgear R7000
To showcase the usage of Qiling alongside fuzzers, we will try to reproduce a vulnerability discovered by the GRIMM cybersecurity team in april 2022. The vulnerability is a stack buffer overflow found in the firmware update process of the Netgear R7000 router. During this process, some parameters are extracted from the firmware header like header size or the device model intended for the update. Given that the parameter that indicates the header size is not validated before using it to perform memory operations (memcpy), a user could craft a malicious firmware package that overflows the destination buffer, overwrites the CPU’s registers values and achieves remote code execution.
Let’s imagine that we want to evaluate the router’s firmware update process through fuzzing. Using the real hardware to apply different modified update packages can be slow and tiresome so we opt for using emulation. For this, we start by obtaining the firmware image version 1.0.11.128 from the official support page. If this wasn’t an option, we could still get the firmware by dumping it with JTAG or using an EEPROM programmer. Once we have the firmware, the SquashFS file-system that it contains can be extracted by using Binwalk over the firmware image (file with .chk extension). We now have access to the entire file-system and its binaries *Figure 1: Firmware extraction with Binwalk
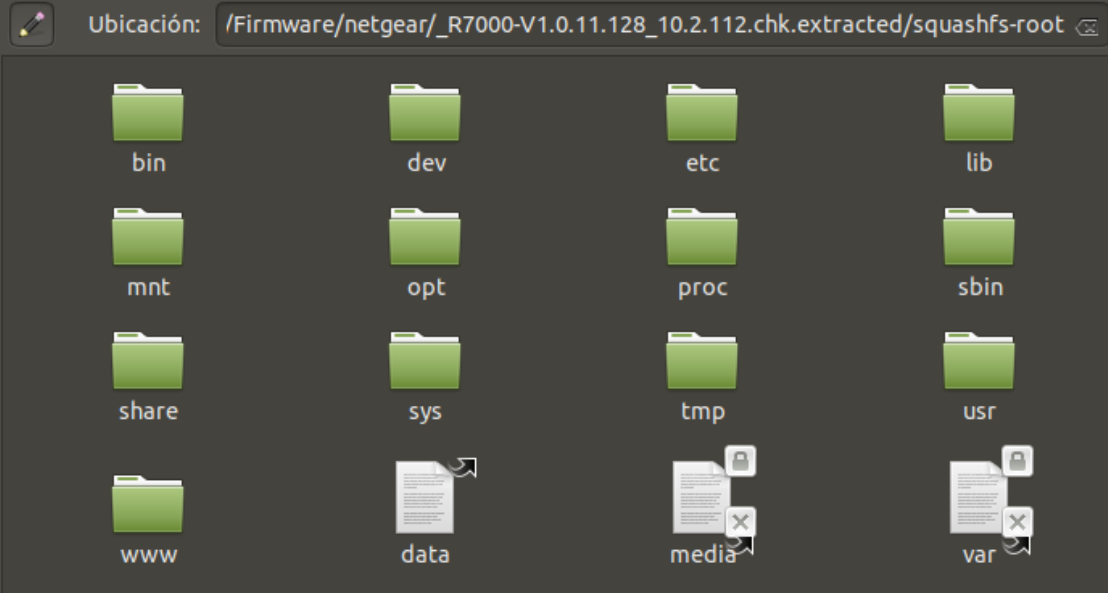 *Figure 2: Netgear R7000 file-system
Now it is necessary to identify through reverse engineering which binary and code functions manage the firmware update process. With this we know that our target binary is the router’s UPNP daemon (usr/bin/upnpd). This binary has a function that processes the different parameters included in the firmware header and makes some safety checks before starting the update process. We analyse the binary with Ghidra to see the decompiled function code and the insecure call to memcpy at step 3.
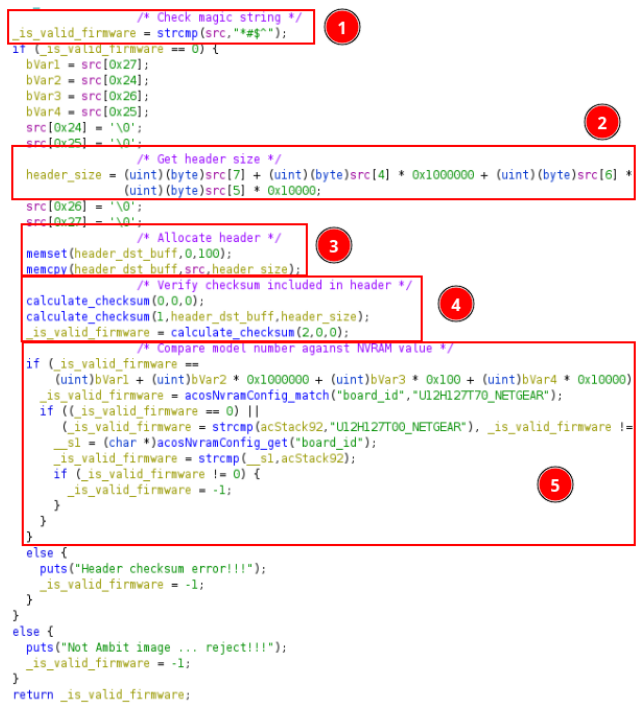 *Figure 3: Firmware header check function decompiled in Ghidra. Magic number, checksum and device model are checked.
After choosing our target code it is necessary to ensure that we are able to emulate it properly prior to start fuzzing it. A small Python script can be created using Qiling’s API to first write the input firmware into memory, change the program’s main function to the target one and lastly, continue execution. When running the script with a firmware package we observe that the magic number and checksum checks are performed properly but the one where the model number is checked fails due to the fact that no NVRAM containing the required parameter is being emulated.
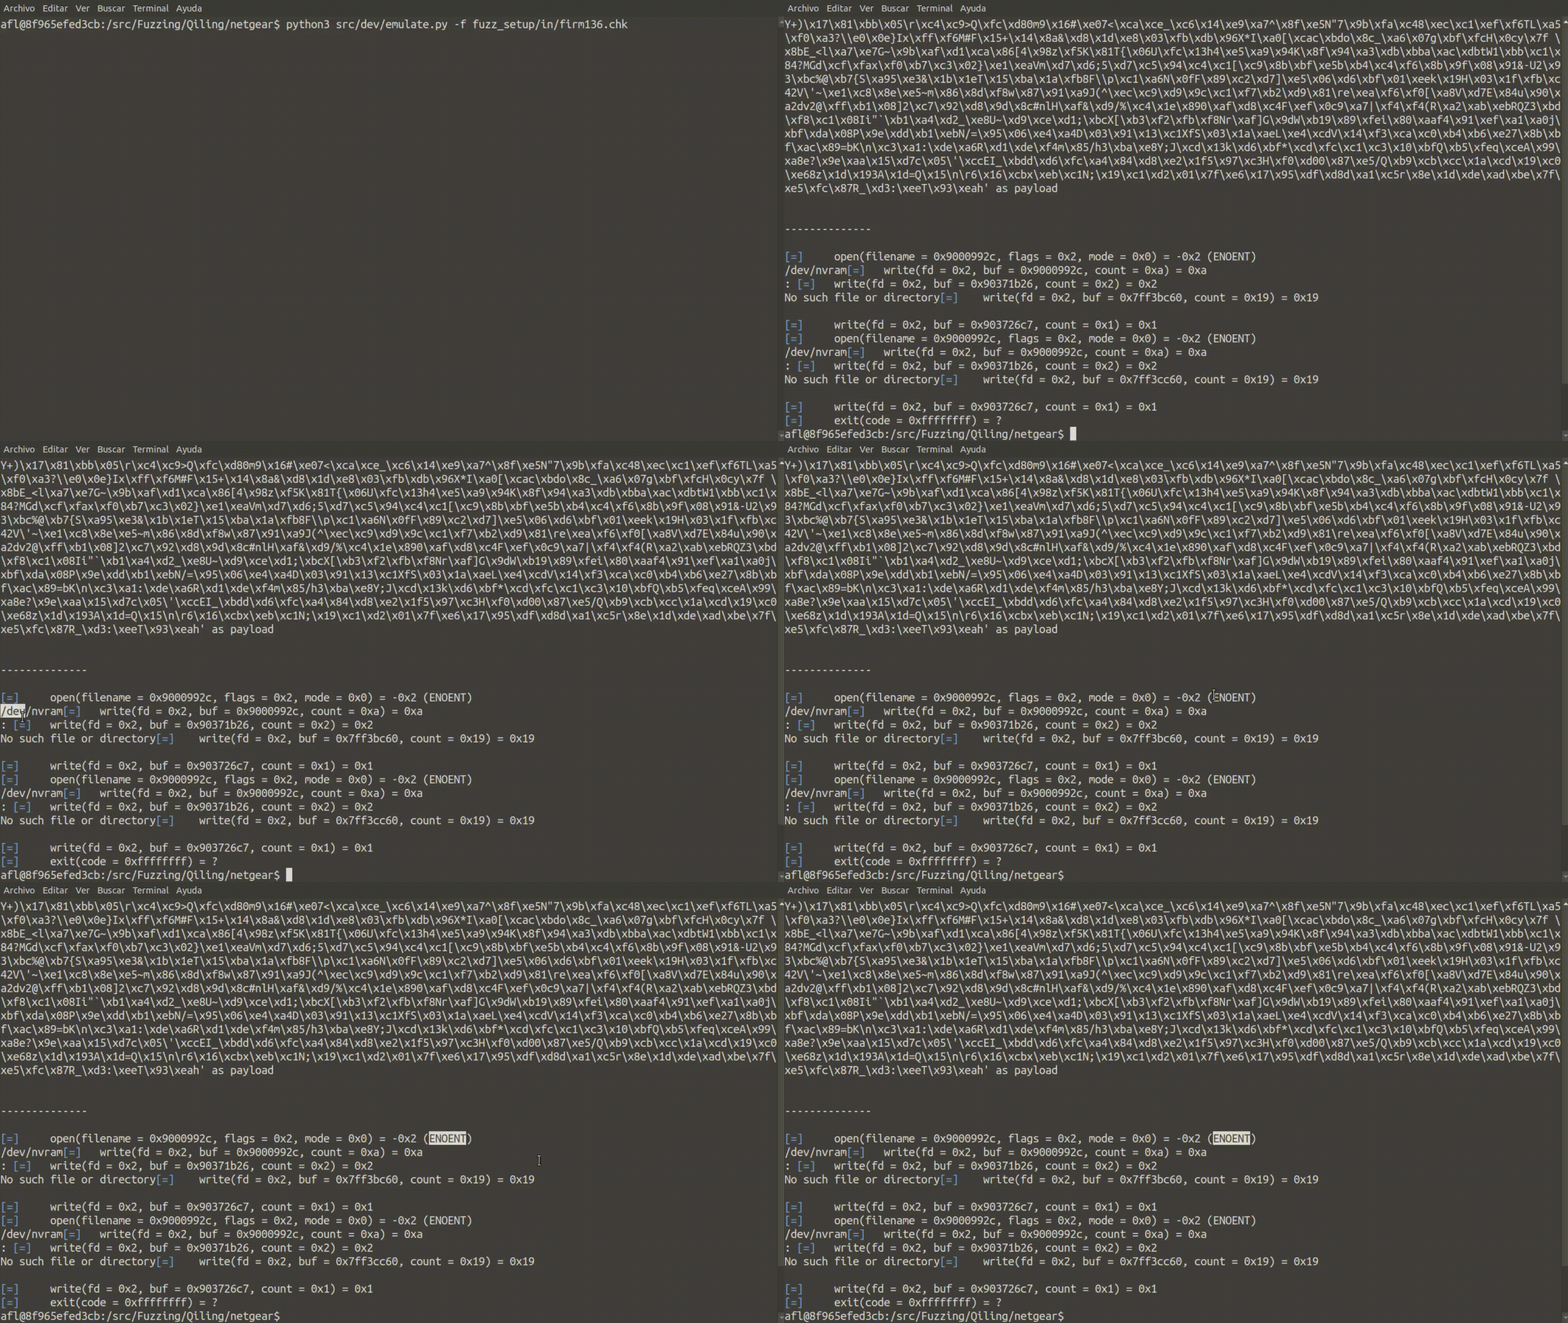 *Figure 4: Emulating the header check function without an NVRAM.
To solve this, those checks could be skipped entirely or if we are interested in emulating the complete function, the nvram-faker tool could be used to intercept NVRAM reads to make them return the desired value. ¡The function now emulates properly with this tool!
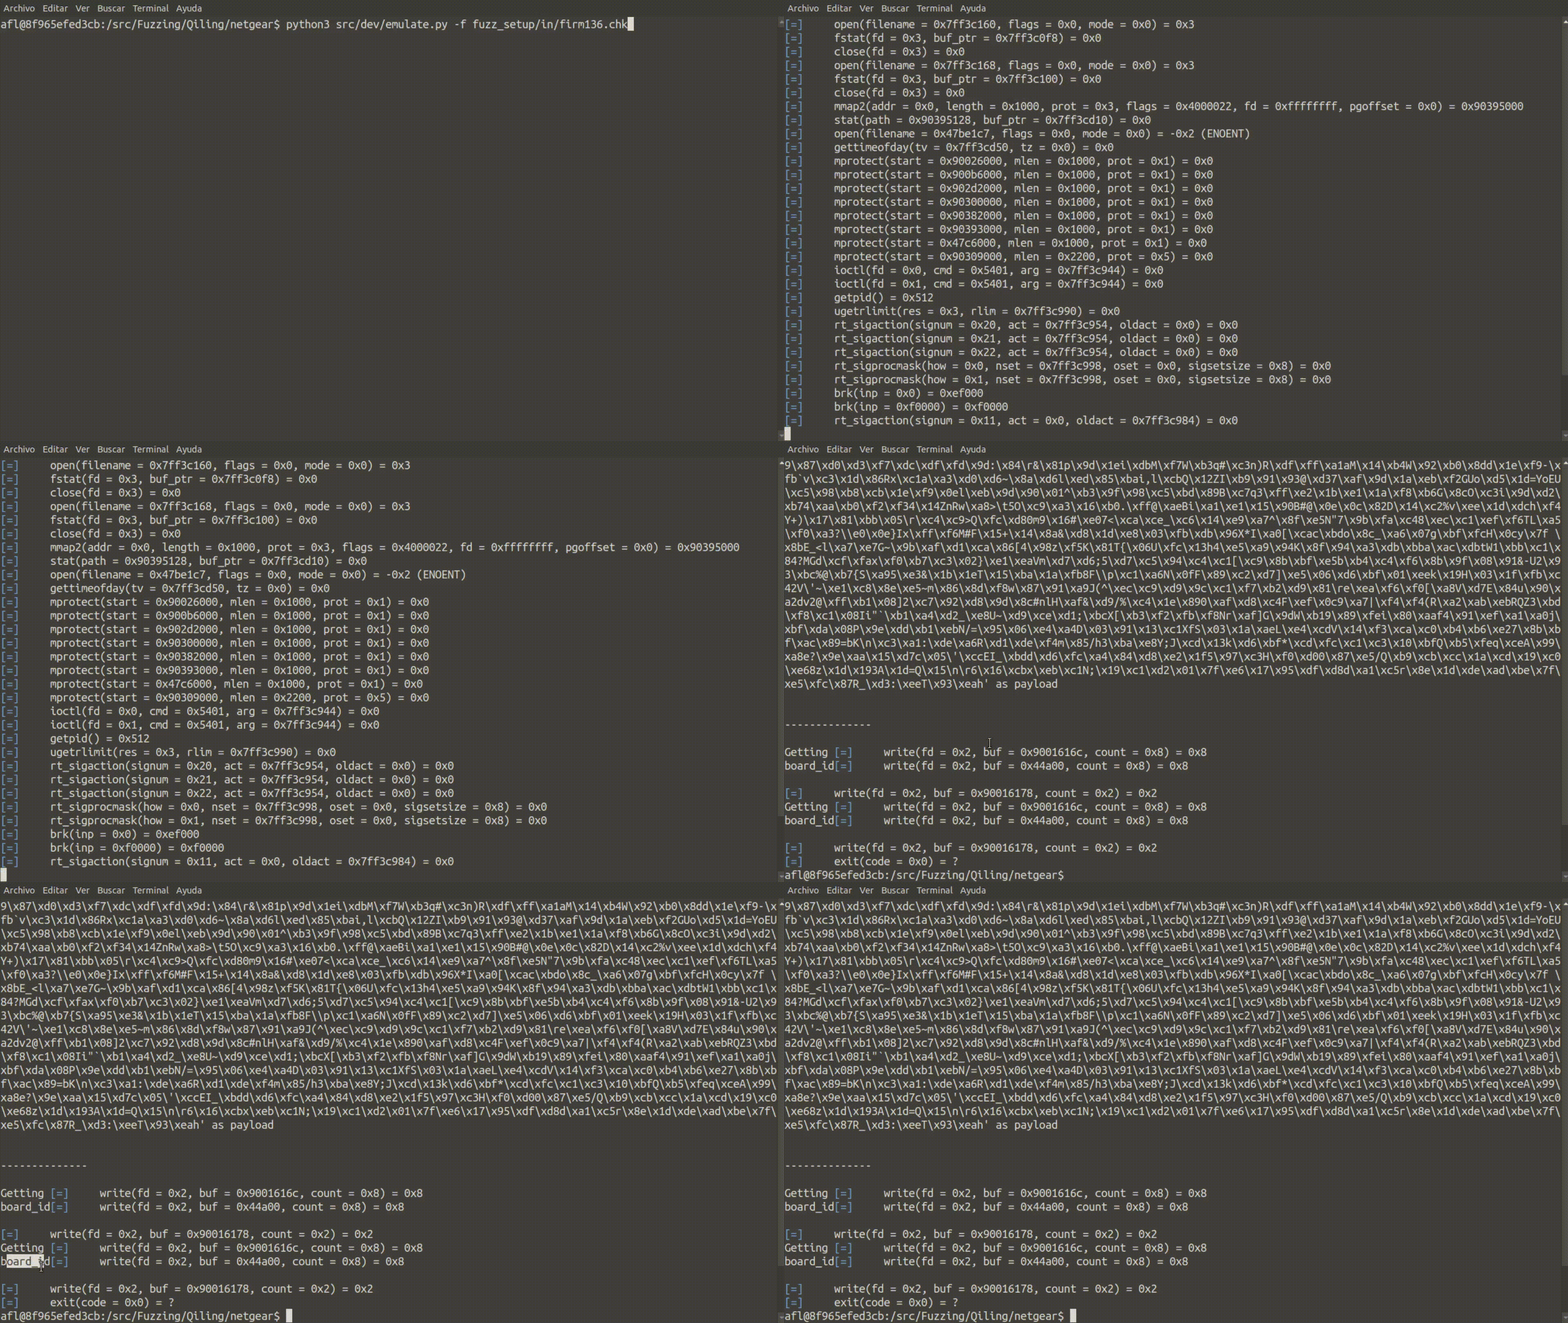 *Figure 5: Emulating the header check function with nvram-faker.
After getting the function to run properly under emulation, the created emulation script can be used as a base to integrate the emulation process with a fuzzer. This way, the fuzzer handles the input mutations which will then be given to Qiling who feeds them to the binary. Qiling scripts can be easily integrated with AFL++ or even with black-box fuzzers such as Radamsa.
AFL++ integration can be achieved by modifying the script so the input firmware is written into memory from a callback called by AFL++ instead of doing this ourselves manually in the script. With this, the function will be called in each fuzzing iteration with the mutated firmware as parameter. Lastly, we need to prepare a list of valid firmware headers that will serve the fuzzer as a starting point for its mutations. The three latest available firmware images will be used for this. Let’s run AFL++ in Unicorn mode with our new script and wait.
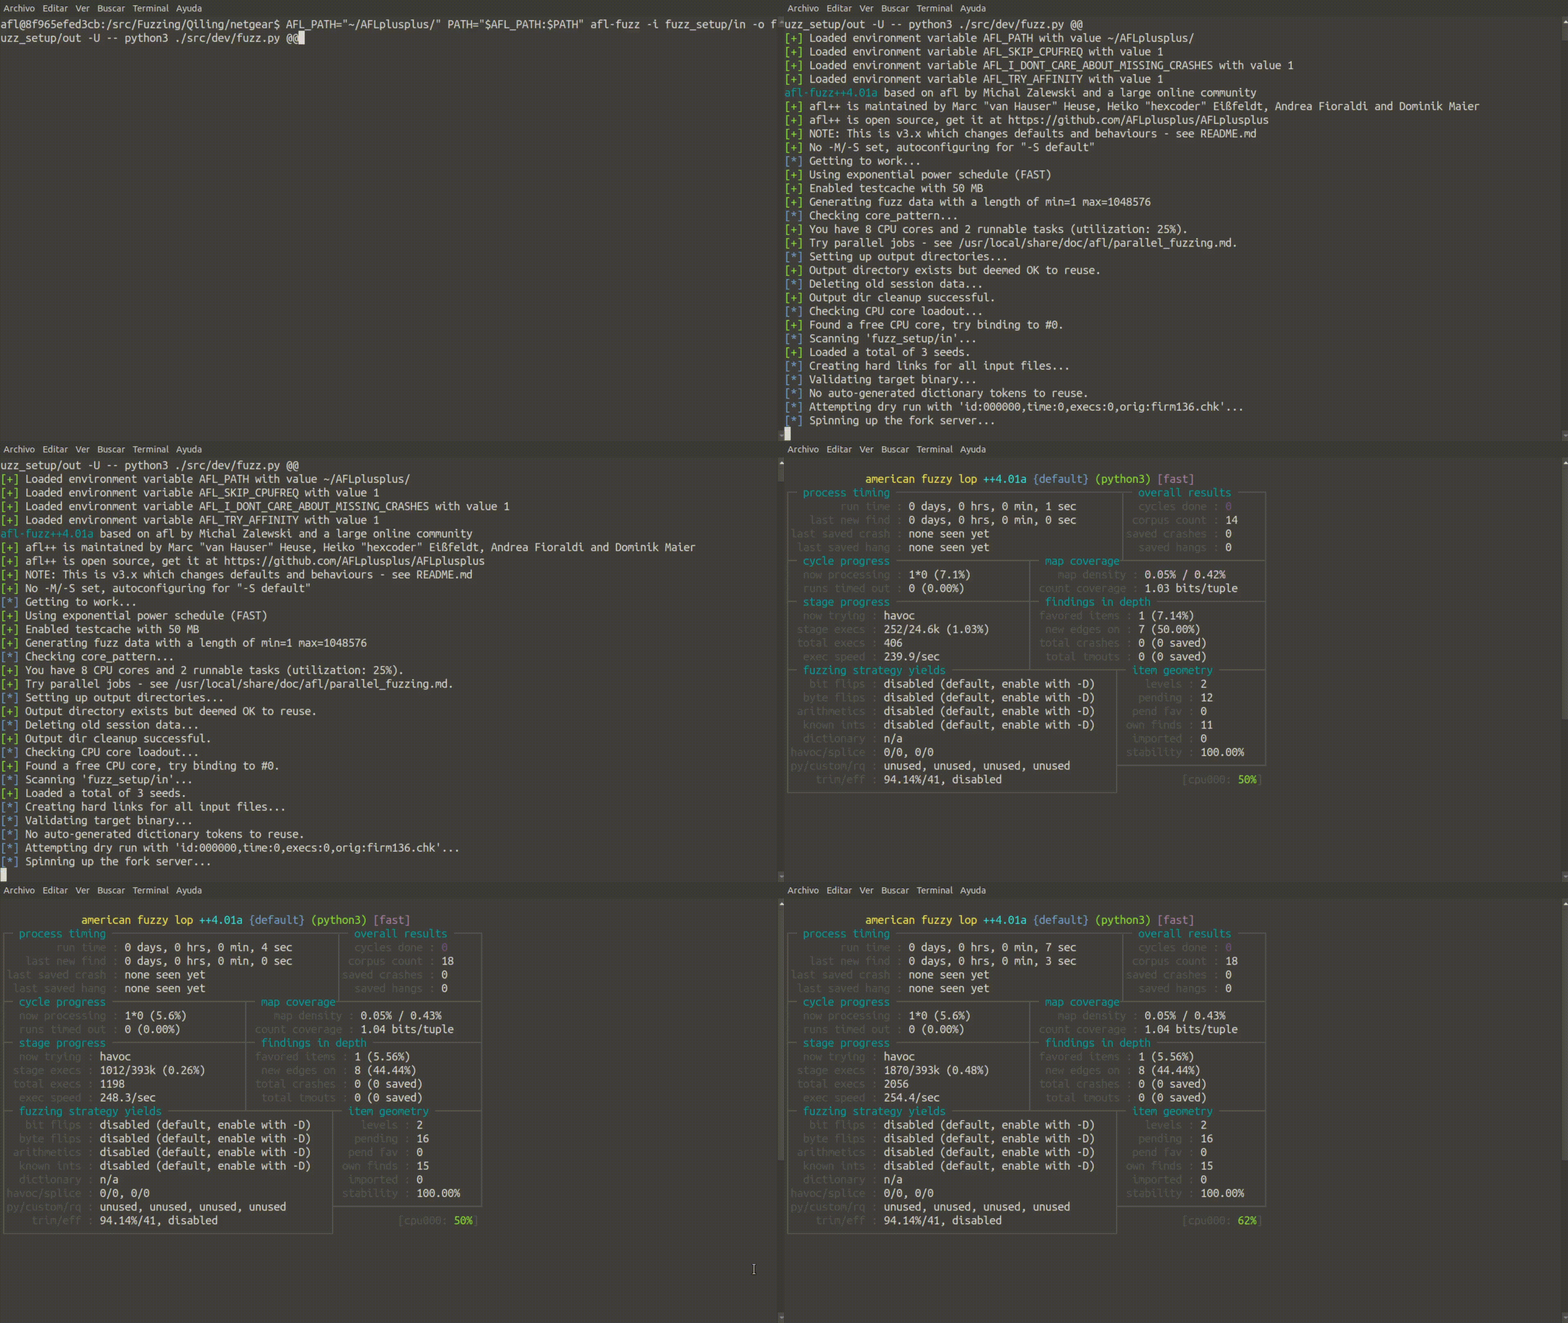 *Figure 6: Starting the fuzzing session in AFL++.
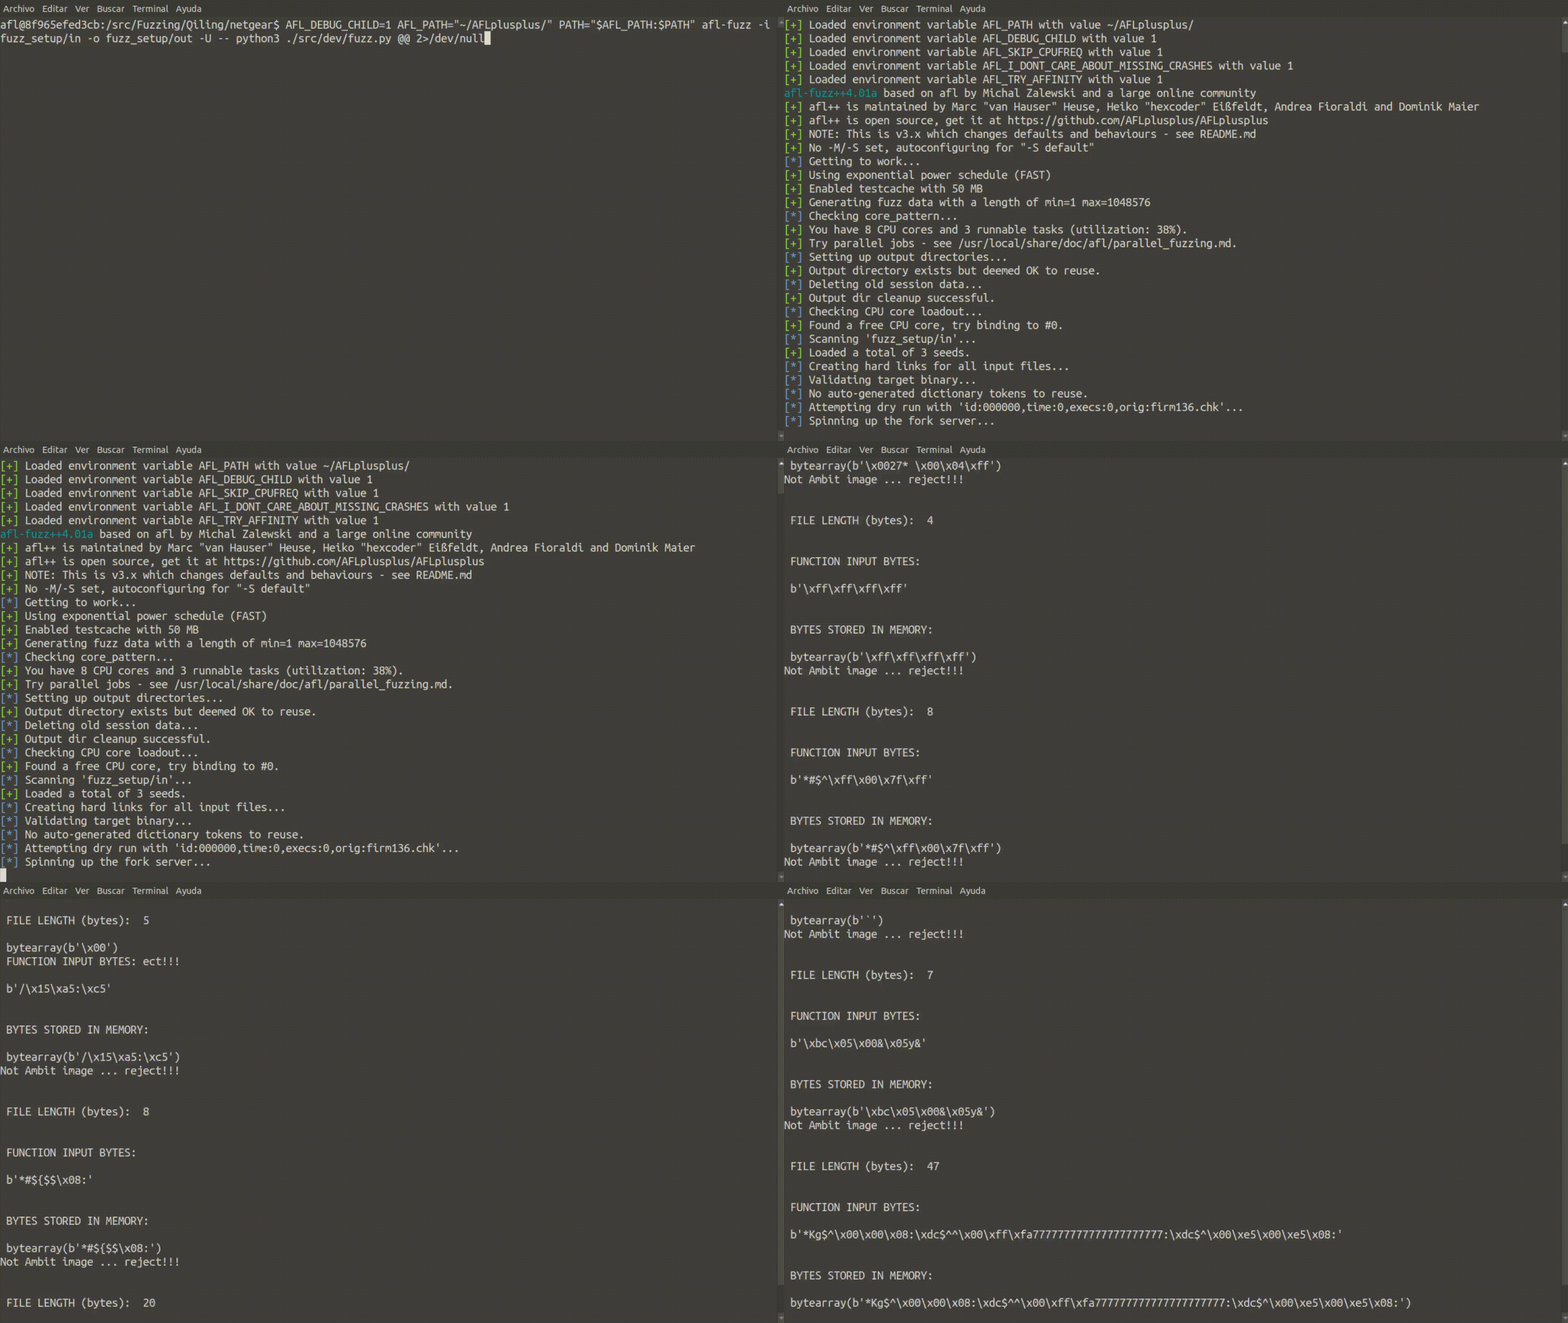 *Figure 7: Fuzzing in AFL++ with debugging output enabled.
In less than a minute AFL++ is capable of detecting the crash caused by the stack buffer overflow. The mutated firmware header responsible for the crash specifies a header size (bytes 5, 6 and 7) greater than the available destination buffer size. If we try to emulate the function with the mutated firmware, an invalid memory operation is reported by the emulation engine. We found the vulnerability that we were looking for!
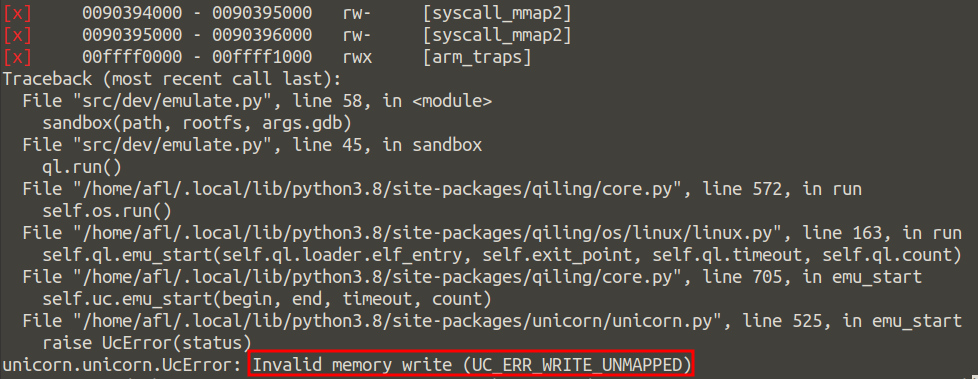 *Figure 8: Crash caused by the mutated firmware.
Conclusion
Even though fuzzing is an effective technique vastly used nowadays, it is not as popular in the field of IoT and embedded systems due to the different challenges that it poses. Combining the knowledge about emulation, dynamic instrumentation and fuzzing that was discussed in this article allows us to go one step further when it comes to evaluating the security of all kinds of smart devices in order to identify vulnerabilities that could otherwise be unnoticed.
The code used for the different scripts can be found here.


